The haircut library · Decision guide
How to Choose a Haircut That Fits Your Routine
A practical way to weigh styling time, natural texture, face framing, and salon upkeep before your next cut.
What haircut should I get? Start with the hair you have when it dries naturally, the minutes you can actually spend styling each morning, and how often you want to return to the salon. Those three answers will narrow your choices more reliably than a photo styled for a camera.

Step 1: Audit Your Morning Styling Reality
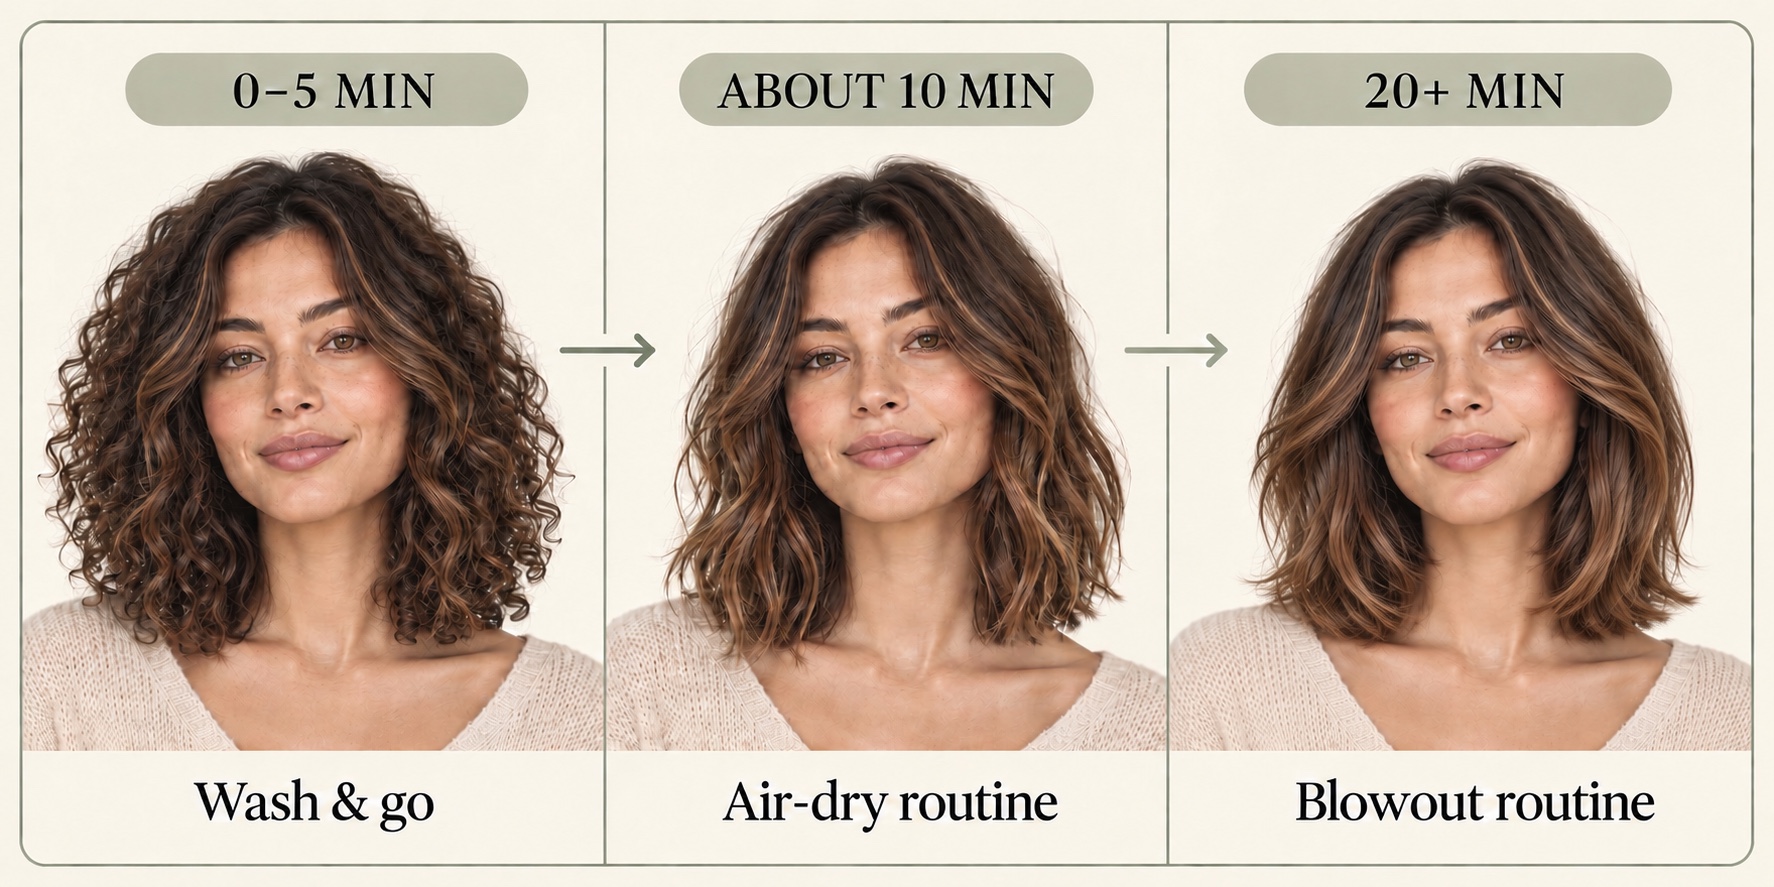
For one week, notice what you do after washing and on non-wash days. Do you air-dry, reshape a few pieces, or use a brush and dryer from start to finish? Count hands-on time, including reworking bangs or smoothing the back. A cut that looks easy after a professional blowout may require that same work at home.
Use a reference photo to show a direction; use your routine to decide whether that direction will work on an ordinary Tuesday.
Choose the routine you would willingly repeat:
Swipe across the table to see every comparison.
| Morning plan | Hands-on time to plan for | Cuts to discuss | Main trade-off |
|---|---|---|---|
| Wash-and-go | Up to 5 minutes | A soft, medium-length perimeter that works with your natural texture | You accept the shape your hair makes as it dries, rather than a polished finish every day. |
| Air-dry with a little product | Around 10 minutes | A collarbone cut or gentle layers that encourage existing waves or curls | A small amount of cream or leave-in product and occasional reshaping may still be needed. |
| Blowout or heat styling | 20 minutes or more | A precise bob, smooth fringe, or more deliberately sculpted layers | The finished look depends on skill, tools, and repeat styling. |
These times are planning examples, not promises for any hair type. A short bob can demand more work than long waves; a curl-friendly cut may need a longer wash-day routine but little next-day styling. If you use heat, the American Academy of Dermatology’s styling guidance recommends limiting heat exposure and using lower settings. Take a photo of your hair on a normal air-dried day and another on a styled day. Bring both to the consultation.
Step 2: Understand Your Natural Texture & Strand Density
Look at your hair dry and unstretched, especially where the ends land. Straight, wavy, curly, and tightly coiled hair can give the same cut very different outlines. Curls spring upward as they dry, so ask the stylist to judge the finished length on your own dry curl pattern rather than promising a fixed amount of shrinkage.
Two words often get mixed up. Strand diameter describes how thick one hair feels; fine hair has a smaller individual strand. Density describes how much hair grows across an area of the scalp. You can have fine strands and plenty of them, or thicker strands with lower density. Hair-fiber research treats diameter and density as separate measurements, which is why a photo alone cannot tell your stylist how a layered shape will fall on you (review in Proceedings of the Royal Society A).
A deeply layered reference made on dense hair may leave a fine or lower-density perimeter looking sparse. Ask where the weight line will sit and whether a softer surface layer would give movement without sacrificing the outline. Explore the focused guides on cuts for fine hair and length, shape, and shrinkage for curly hair before choosing a reference.
Step 3: Match the Silhouette to Your Face Shape
Think about where a haircut draws the eye. A fringe can bring attention to the eyes; face-framing pieces ending near the cheekbones create a different effect from pieces ending at the chin. Layers starting at the collarbones can preserve more weight around the face than shorter layers near the cheeks. Mark the landmarks you like in your reference photo, then compare them with where those pieces would fall on you when dry.
Face shape is a way to discuss proportion, not a list of forbidden cuts. You may prefer a wide, rounded silhouette or a long, narrow one. A part, fringe, and placement of volume can change the visual effect without changing the cut’s overall length. Use the face-shape comparison guide to describe the effect you want. If your face has rounder proportions, the round-face silhouette guide gives more examples without treating any feature as something to hide.
Step 4: Calculate the Salon Maintenance Schedule
Choose a cut you can maintain between appointments, not just on the day it is trimmed. A close pixie or graphic chin-length bob has a conspicuous edge; small amounts of growth can move that edge quickly. For planning, ask whether you could return in roughly 4–6 weeks to keep a precise short outline. If that cadence doesn’t fit, request a shape that grows out softly.
Longer, softly layered cuts often leave more room between shape corrections. 10–12 weeks can be a starting point for a salon conversation, not a universal interval: your growth rate, fringe, hair condition, and preferred outline matter. Ask your stylist what the cut will look like at weeks four, eight, and twelve and which pieces may need attention first. Include wash-day effort and the cost of return visits in the decision.
The Consultation Checklist: What to Ask Before the First Cut
Bring two or three references that show the front, side, and dry finish, plus a photo of your own hair on a normal day. Then ask:
- “This is the shape I like. Where would the shortest face-framing piece land on me when my hair is dry?”
- “If I air-dry and spend five minutes styling, which part of this reference will look different?”
- “Will these layers keep enough weight at my ends?”
- “How will my curls change the apparent length after drying?”
- “What will this cut need each morning, on wash day, and after six weeks of growth?”
- “Can you show me a lower-effort version of the same silhouette?”
Listen for specific actions and length landmarks. If the plan depends on a round brush, a hot tool, or a salon visit you cannot fit in, adjust the cut before the first snip. The salon consultation guide helps turn your photos and routine into a clearer brief.
Frequently Asked Questions
How do I know if a short haircut will suit me?
Try describing what you want around your jaw, neck, and ears, rather than relying on a fixed face-shape rule. Pin your hair back or compare reference photos with similar proportions, then ask a stylist how the front, side, and nape would be cut on you. The practical test is whether you like the exposed outline and the styling and trim schedule it needs. A preview or photo can help you discuss direction, but it cannot guarantee the finished result on your hair.
Can I get layers if I have very thin hair?
Yes, if the layers are placed with your ends in mind. Ask for a strong perimeter and a few light surface or face-framing layers, then have the stylist show where the shortest pieces will fall. Deep thinning through the ends can make a lower-density outline look less full. The right amount depends on strand diameter, density, texture, and the shape you prefer.
What is the easiest haircut to maintain overall?
For many routines, a medium-length cut with a soft perimeter and your natural texture is a useful starting point: it leaves options for tying hair back and lets small changes in length grow out gently. There is no universally easiest cut. The easiest for you is the one whose normal dry shape you like, whose daily steps you will repeat, and whose salon schedule fits your calendar.